Using a free file converter, you will quickly transform images to the proper format and size—ideal for websites, social media, or sharing. Simply upload your files, pick your target output format (like JPEG, PNG, or GIF), and get the output in seconds. These tools manage multiple file conversions, compress images to conserve storage, and protect your information. You won't need any special skills, and you'll satisfy different platform requirements with ease. Stick around to explore features, privacy tips, and more.
Main Insights
The Importance of Fast Image Conversion
If you're modify a website, transfer files to customers, or create images for social media, rapid image conversion preserves precious time and energy. It's essential to ensure your images conform to the right format, and often, the appropriate size. Reducing file size is crucial—reduced file sizes enhance online performance, decrease storage needs, and make sharing easier. When dealing with multiple images, batch processing proves crucial. Rather than converting files one by one, batch processing enables you to transform entire folders with minimal effort. This efficiency is essential in professional workflows where time counts. Fast image conversion guarantees your files are suited for various platforms and devices, improving productivity and preserving quality, all while meeting specific requirements for size and format.
Core Characteristics of a Professional File Format Converter
When selecting a high-quality file converter, you must evaluate features that optimize your process and ensure reliable results. Effective file compression is essential, enabling you to minimize file sizes without losing image quality. This conserves storage space and accelerates file transmission. Another key feature is batch processing—managing multiple files in parallel boosts productivity and prevents repetitive tasks. Search for converters with a easy-to-use interface, so you can easily access options and settings. Fast processing ensures you're not waiting around, even with large files. Additionally, comprehensive security measures safeguard your data during conversion. Dependable functionality, minimal errors, and automatic updates complete the essentials. These features guarantee your file conversion process is smooth, efficient, and reliably excellent.
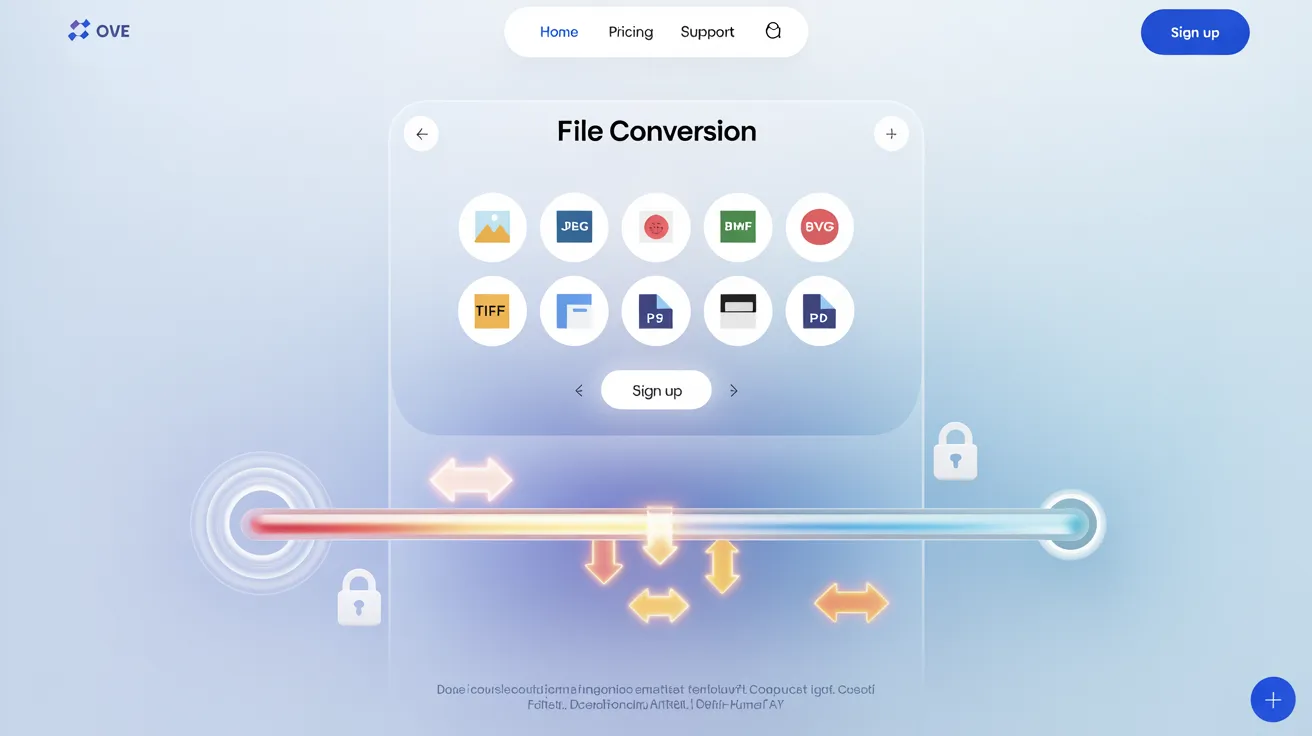
A Guide to Supported Image Formats
You'll likely work with popular image file types such as JPEG, PNG, GIF, and BMP. It's crucial to understand the difference between lossless formats that preserve image quality, and lossy formats that reduce file size by eliminating certain information. This knowledge helps you select the best format for your needs, whether you want smaller file sizes or highest image fidelity.
Common Picture File Formats
Wondering about the many image formats available to you? You'll come across several common types when handling images. JPEGs are commonly used for photos thanks to compact file sizes and broad compatibility. PNGs excel at preserving transparency and detail, excellent for graphics with precise details. For vector graphics—images that resize cleanly without quality loss—SVG is your best choice. If you need animated images, GIFs are widely supported, however they use limited colors. BMP files are bigger but uncompressed, but specific applications demand them. TIFF delivers flexibility and allows for layering, favored in publishing and design. WebP optimizes quality and size, gaining popularity for web content. Understanding these formats enables you to pick the best option for your requirements and ensures smooth, quick conversions.
Breaking Down Lossless vs. Lossy Compression Formats
Ever pondered why particular image files are crystal clear but hefty, while others are compact yet somewhat fuzzy? This is determined by compression techniques. Formats like PNG and TIFF, such as PNG and TIFF, preserve every detail by condensing data without losing any information. This results in pristine quality, but the file size remains relatively large. Lossy formats, including JPEG, use aggressive compression approaches to decrease file sizes considerably by dropping less visible details. This renders images faster to transfer and save, but you'll observe small quality loss, notably after several edits or conversions.
When deciding between lossless and lossy formats, think about your requirements for compression and fidelity. Additionally, consider format compatibility—different devices and platforms only work with certain formats, which can influence your decision.
Simple Steps to Use the Converter
First upload your file directly to the platform. Then, select your desired output format from the available options. When the conversion finishes, you can obtain the transformed image right away.
Adding Your Image File
Want to get started? First, click the "Upload" button on the converter's main screen. You'll get an option to browse for your image file from your computer. Be certain you know where your file is stored for easy access. Before uploading, check your image resolution and file size—larger images and weightier files may take additional time to upload, relative to your internet connection. Most converters work with common formats like JPG, PNG, or GIF, but check your file type is compatible. Once you select your file, the upload process will start automatically. You'll view a progress bar showing the upload status. Don't close the tab during this operation. After the upload completes, you're good to go to move on to the next step in the conversion process.
Choosing the Output Format
Once your image is uploaded, you must pick your desired output format from the available formats provided by the converter. Choosing the format is a vital step, as it establishes how your image will be stored and used later. Most conversion tools handle typical formats including JPG, PNG, GIF, BMP, and TIFF, enabling you to pick the option that fits your needs. Use the dropdown menu to make your selection—several converters even provide quick explanations of the formats to assist your decision.
According to the converter, you could find customization settings. These let you configure settings such as image quality, level of compression, or color profile before converting. Carefully select these settings to guarantee your converted image matches your exact needs. Review your options before moving forward.
Retrieving Your Converted Image
How can you save your newly converted image? Once the conversion finishes, you'll notice a clear download button or link. Simply click to download the processed file to your device. If you applied file compression or image resizing, the downloaded image will show the adjustments—optimized for the dimensions and size you selected. Your converted image usually downloads to the default folder; check there if you can't locate the file.
For your security, always verify the download has completed before closing the converter page. If you converted multiple images, you could receive a ZIP file containing all outputs. Decompress the images using common file management tools. Remember the quality of file compression and image resizing influences your downloaded picture's clarity and functionality, so review the output before printing or sharing.
Analyzing Free and Paid Image Conversion Software
While evaluating image processing software, you'll observe notable differences between free and paid alternatives. Free options usually offer a basic user interface that's easy to use but may lack premium functions or customization options. You could experience advertisements or file size limits, which may impact your workflow. Paid tools typically offer a refined user interface, featuring batch conversions, better quality results, and more file formats.
Customer assistance represents an important distinction. Free converters generally don't offer personalized assistance; if difficulties occur, you'll mainly have to use user forums or documentation. By contrast, paid solutions commonly come with responsive customer support, helping you address issues promptly. Ultimately, your decision is based on your particular needs—if you appreciate convenience, enhanced functionality, and help, investing in a paid alternative may be worthwhile.
Security and Privacy During File Conversion
While free file converters offer simplicity, it's important to examine how they handle your data during the conversion process. When you transfer images to a converter, you're entrusting the platform with potentially sensitive data. Make sure the service uses strong encryption standards for both data transmission and storage. Strong encryption safeguards your files from interception. Before uploading, review the service's user privacy policies to understand how your data is managed. Reputable converters should state whether they keep, distribute, or delete your files after processing. If you don't observe transparent privacy guidelines, reevaluate using that service. Following these precautions helps you protect your personal details and guarantees that your converted images stay protected throughout the conversion. Invariably value security over convenience.
Tips for Improving Processed Graphics
To ensure optimal image output that's both high-quality and space-efficient, pay attention to optimizing settings before saving. Initialize by choosing the right image resolution—greater resolution offers better clarity but enlarges file size. For web purposes, choose a balanced resolution to create an optimal balance between clarity and loading speed. Next, configure color depth depending on your needs. Lower color depth minimizes file size but may affect gradients and subtle tones, while increased color depth retains color fidelity at the cost of larger files. Make sure to preview your output to verify visual quality satisfies your expectations. Lastly, select the most suitable format (JPEG, PNG, or WebP) for your specific use case. These measures ensure your converted images are both high-quality and properly sized for any application.
Common Questions
How Many Files Can I Convert Each Day?
When it comes to file conversions, it's important to stay within manageable limits. You must keep an eye on conversion limits, because many platforms implement daily usage restrictions to ensure fair access and ensure optimal operation. These daily limits typically restrict the number of files, total size, or conversion requests you can make. Be sure to review the service's specific guidelines so you don't hit a wall during your conversion tasks.
Is the Converter Compatible with Mobile Devices?
The converter can be used on your mobile device, because of its mobile compatibility. The platform's responsive design ensures efficient functionality on different devices, so you won't face major device constraints. Simply access the converter via your mobile browser, pick your files, and start converting. There's no need to install additional applications, making the conversion simple and easy to use. Make sure your device has a stable internet connection for optimal results.
Do You Need an Internet Connection to Use This Tool?
Just like a car needs fuel to run, this tool requires an internet connection to function. Offline operation isn't possible, so web access is necessary for handling uploads, processing files, and obtaining results. If your connection primary source drops during use, your conversion might fail or remain incomplete. You need to maintain an internet connection throughout the entire process to maintain seamless functionality and proper file processing each time.
Will Your Converted Images Include Watermarks?
When you convert images, you generally aim to make sure there's no watermark added to your files. Quality conversion services focus on watermark removal, ensuring your processed images retain high image quality. You won't have to worry about distracting logos or marks affecting your visuals. Make sure to review the tool's policy, but you'll generally receive clean, professional results that respect your original content. When quality preservation is important, you can rely on trusted conversion tools.
How Should I Report Issues or Propose New Features?
Should you encounter a technical difficulty or would like to recommend a new feature, you need to use the feedback form typically found in the app's support area. This is the section where you can detail any concerns or send feature requests. Be sure to provide detailed information, so that the development team can address your issues promptly. Your feedback enhances the service and makes certain that new features align with users' needs.
Conclusion
Picture a file converter as a connection, carrying your images from one format to another—rapidly, safely, and effortlessly. With the proper tool, you're not just changing formats; you're discovering innovative solutions and enhanced communication. By picking a reliable, safe converter and improving your files, you preserve your digital world orderly and effective. Proceed with confidence across that bridge—your images will arrive perfected and prepared for the next step. Your workflow merits nothing less.